My favourite cakes to make are Mini Layered ones. The ingredients that are required are minimal, and they are so cute and stand as high as they are round. The slices are teeny weeny and are just a few mouthfuls, which as far as I am concerned, is enough to fight off the sugar craving.
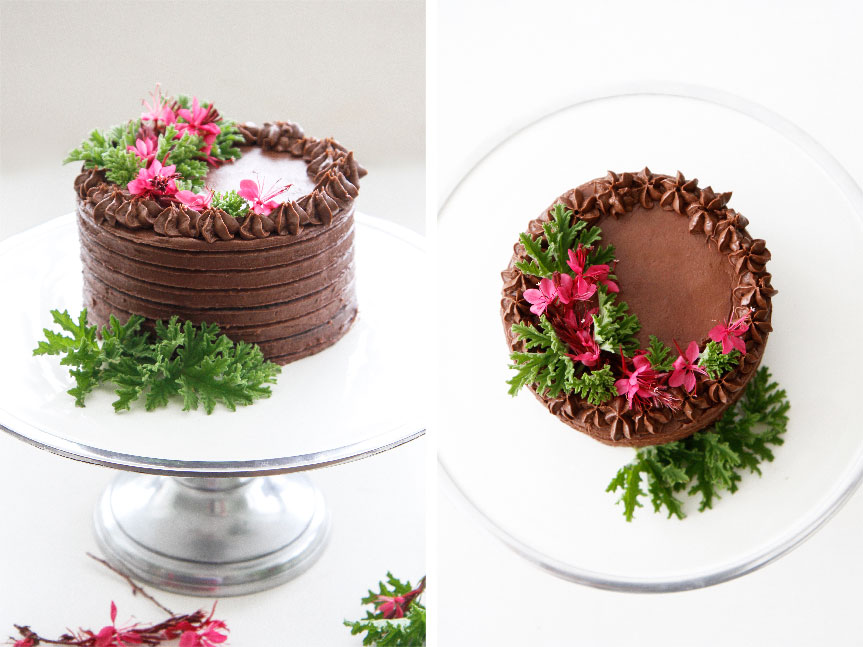
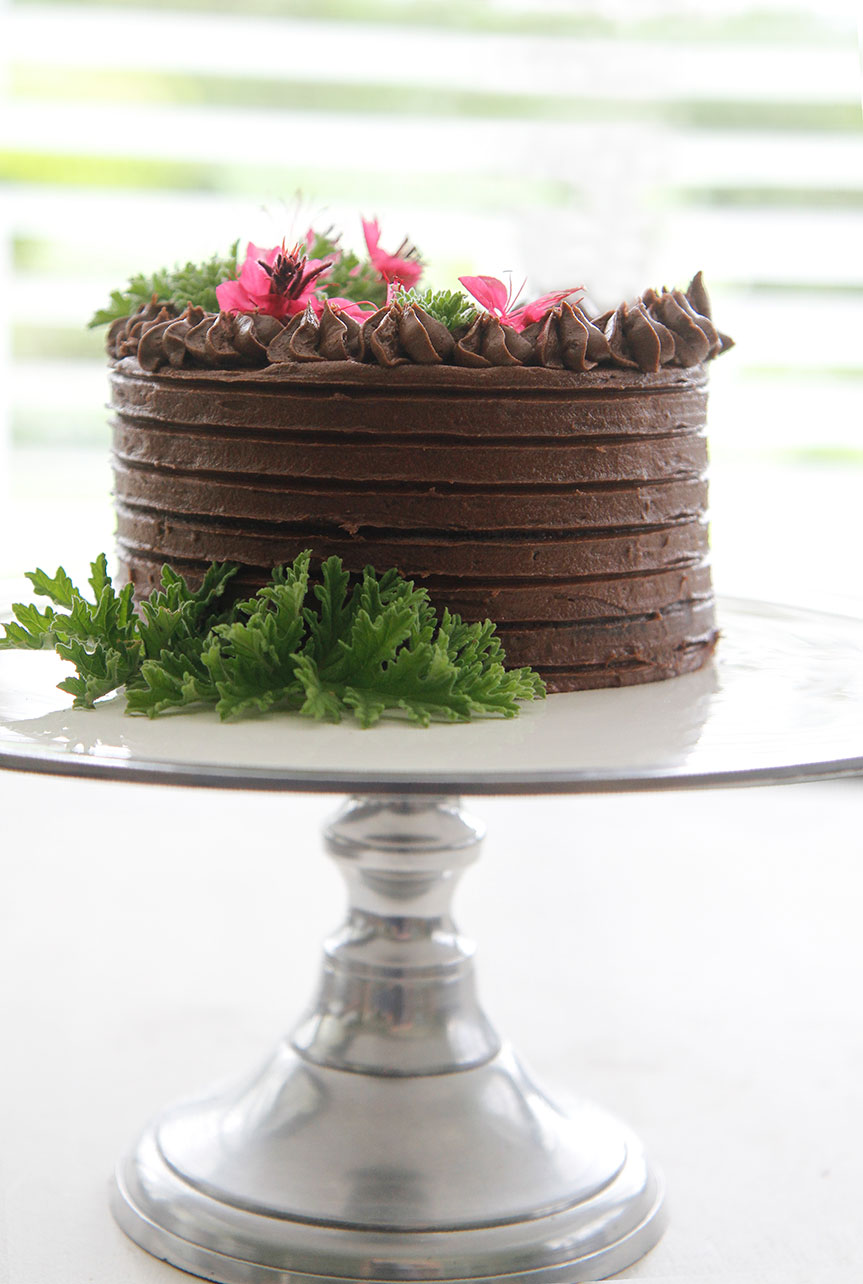
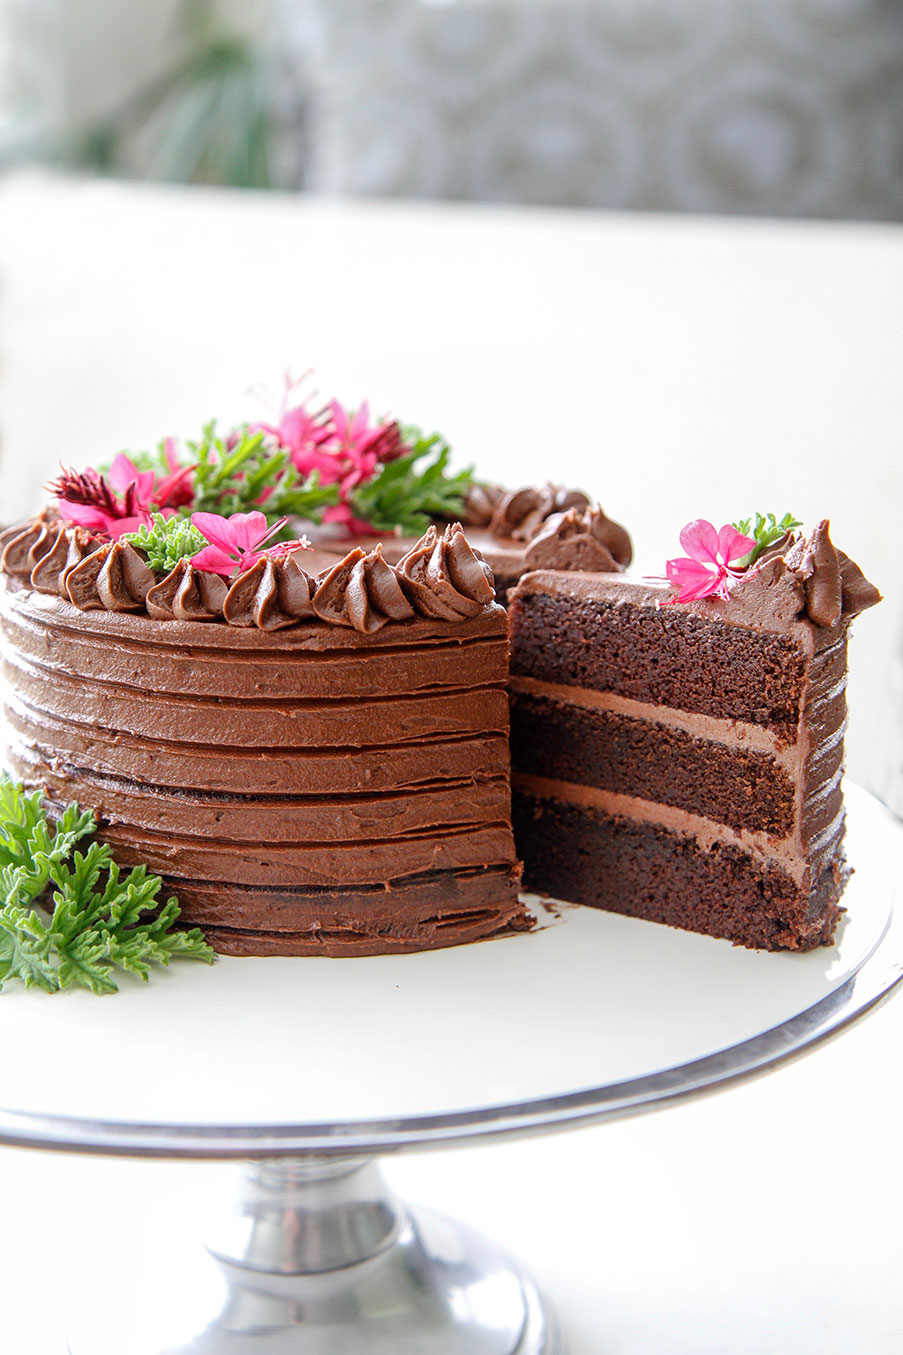
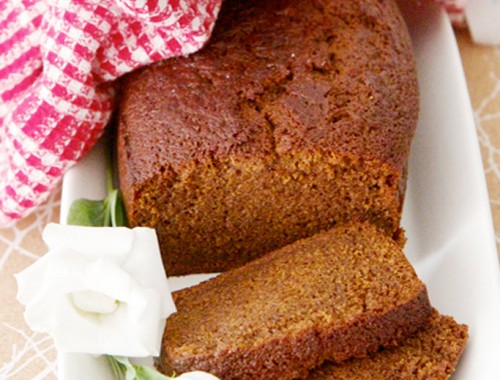
This cake cooks at a very low temperature for a long time, but it comes out level and perfect every time. I use a 6 inch (15cm) deep cake tin which is not a common one, and if you are going to make it, make sure that you do not use a bigger tin as it will not work . You should be able to find this size at all good baking shops . I topped it with a soft chocolate buttercream frosting and the smallest Rose scented geranium leaves and tiny flowers that I could find in my garden. This recipe will last in an airtight container for up to 5 days , which makes it a great cake to make if you have to bake well in advance of a function. I always keep my cakes in the fridge until a few hours before I need them. It keeps the icing firm and the flowers stay fresh.
Happy baking my friends.
This recipe is adapted from the Australian Women's Weekly "Decorating Cakes" cookbook.
Because this is cooked on a low heat and is a deep dish cake it cooks for approximately an hour. If you were cooking it in 2 tiny cake tins it would cook for far less time
- 90 g (3oz) Dark eating chocolate
- 2 tsp cocoa powder
- 3/4 metric cup water
- 125 5 (4oz) butter
- 1 metric cup dark brown sugar
- 2 (equates to 60g/2oz) eggs
- 1/2 tsp vanilla extract (or 1 tsp vanilla essence)
- 1/3 metric cup sour cream
- 1/2 metric cup plain (all purpose) flour
- 1/2 metric cup self raising flour
- 1/2 tsp bicarbonate of soda
-
Preheat your oven to 160ºC / 325ºF ( yes this is a low oven temperature but it cooks for a long time).
-
Grease and line a Deep 15cm (6 inch) cake tin.
-
Combine broken chocolate and sifted cocoa and add to the water in a saucepan on the stove. Stir over a low heat until the mixture is smooth then transfer it to a bowl and cool for 15 minutes.
-
To this bowl of chocolate mixture add butter, sugar, eggs, vanilla extract, sour cream ad the sifted dry ingredients.
-
Beat all the ingredients on low speed until combined and then increase the speed to medium. Beat it for 3 minutes or until the mixture is smooth and changed to a paler colour.
-
Spread into the prepared tin and bake for 1hr to 1 1/4hrs in a thermofan oven. If you are not using a thermofan oven this can cook much quicker so you will have to watch it.
-
Test cake by inserting a skewer into the centre of the cake. If it is cooked the skewer will come away clean. If there is any mixture on the skeyer, bake it for a further 10 minutes before testing.
-
Allow the cake to cool in the pan, and when cool turn out onto a wire cooling rack.
-
Once cool I like to place the cake in the fridge (wrapped in plastic wrap so that it doesn't absorb any of the fridge smells). Once it is cold and firm I then slice it into 3 even layers before icing with your favourite icing.
-
Decorate with flowers, or chocolate curls.

16 Comments
This cake looks too beautiful. How on earth do you make every cake look better than the last. I love your use of fresh flowers
Thank you for your kind words
Perfection
beautiful and looks so delicious
Thanks Kel, it was so lovely chatting to you today, we must do it more often. Big hugs xxx
Very nice. I personally prefer using icing because the sour cream I feel can spoil easily if left out. Is that true? Oh yeah maybe put American measuring quantities for us Americans. I figured out 1 metric cup was 8.45 fluid ounces. I know I know we are behind and should use metric. Anyway this is beautiful. A work of art.
Thanks so much, yes I know it is always a problem with the metric measurements for you guys in the US. I have been toying with the idea of adding a converter to my blog . The Sour cream is only in the ingredients of the cake and I used a butter icing to decorate the cake.
OMG! How beautiful is this cake. I love mini cakes too though I find them a bit difficult to frost and ice. Yours is just perfect.
Sonali you are so kind. I just love the fact that they are easy to handle, you can hold a layer in the palm of your hand without it breaking. Have a wonderful week.
I am more of a cake eater than a baker, lol, this looks just perfect. Thank you.
I am going to make this tomorrow. BUT Self-rising flour is common everywhere except the USA. If I don’t have any, do I use Baking Powder, Baking Soda or both? I try to find a “make your own self rising flour” recipe somewhere but … I thought I would ask just in case.
Hi Jennifer, To make self raising flour the common rule is 1 cup of flour + 1 tsp baking powder. I normally only use baking soda if the recipe has an acidic element in it, such as vinegar, lemon juice, buttermilk, or yogurt. When the two come into contact, bubbles of carbon dioxide are formed, creating the leavening in your batter. Easily explained – when you mix a base (baking soda) with an acid (vinegar) you get a reaction (bubbles). Baking powder is a mixture of baking soda and a dry acid, such as cream of tartar, and sometimes cornstarch. I hope that helps explain it.
Hello there I am so glad I found you on Instagram! I am a fellow South African 🙂 Could I not bake these in 3 small sandwich tins instead of one deep one? Also you mentioned if baking in a conventional oven setting it would bake much quicker – about 20 -25 minutes maybe?
Hi Marie-Anne, lovely to hear from another South African. So, the thing is, if you bake it in three sandwich tins a few things change. The quantity of ingredients and the cooking temperature will have to be adjusted, because if you used the ingredients in this recipe it would not be enough for the three tins. Obviously when the cakes are baked you will get hard edges to the top of each little cake and theses may or not have to be trimmed to make the cake level when you are icing it. Also the layers would be very thin. That is the reason why I bake it in a deeper tin. If you tell me the exact size of your cake tins I can give you the correct ingredients needed. I would also cook them for 30 minutes. Get back to me and I can help Hope this will help.. Have a great day.
Thank You Sooo Much! I have just made this cake for my Sons 4th Birthday and it was literally perfection! It was so easy to make to! Thank you for this ??
I am so happy that it turned out well. Happy 4th Birthday to your precious little guy.