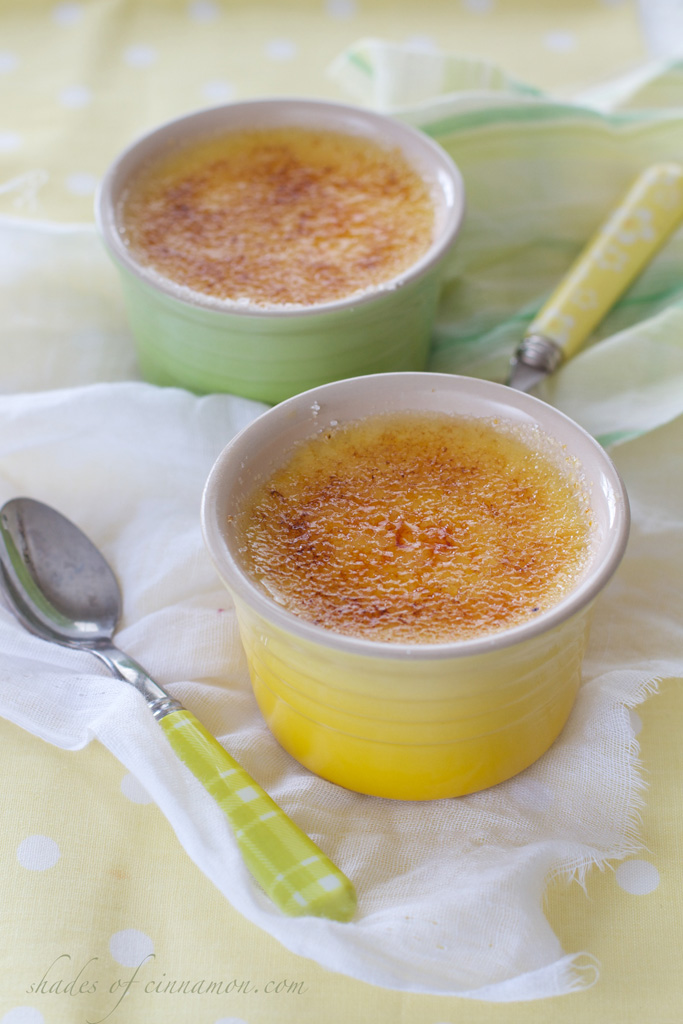
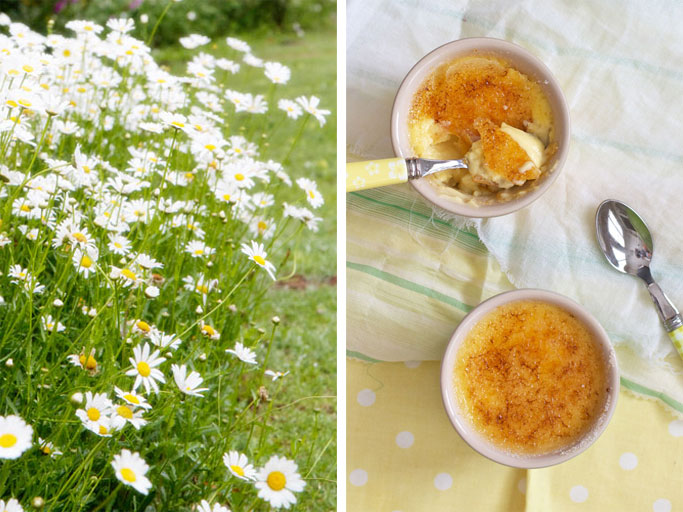
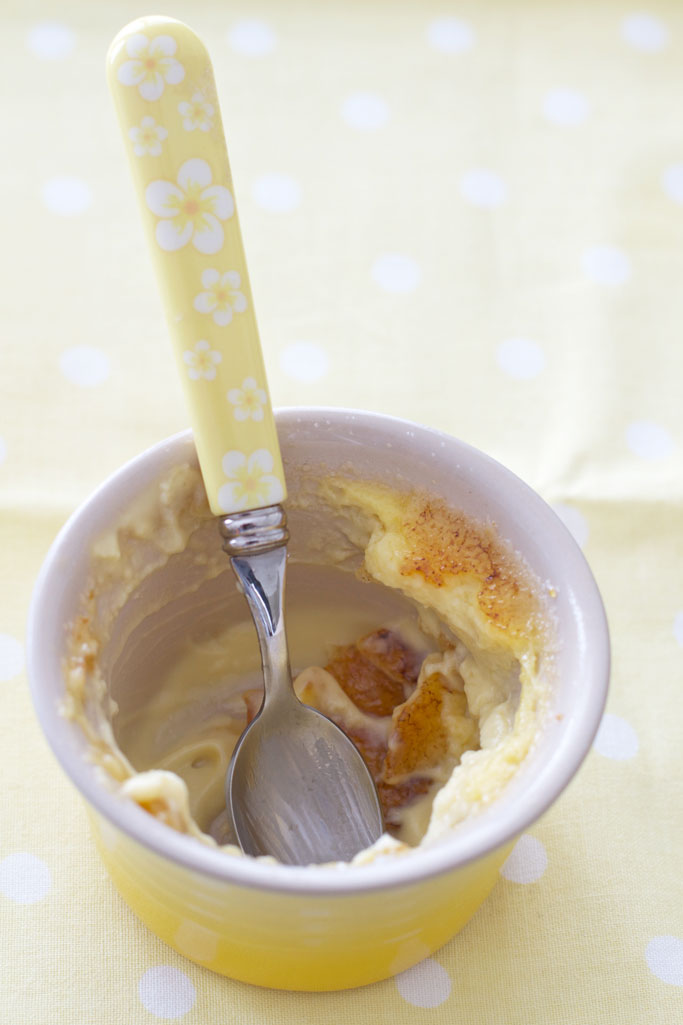
Crème Brûlée is a classic dessert that never disappoints, and is one of my favourite old recipes that has stood the test of time. It’s a symphony of sweet, creamy perfection and a great dessert for entertaining as it needs to be made ahead of time. It can keep for up to 4 days in the fridge, and at the last minute, just a sprinkling of sugar to caramelize will seal the deal.
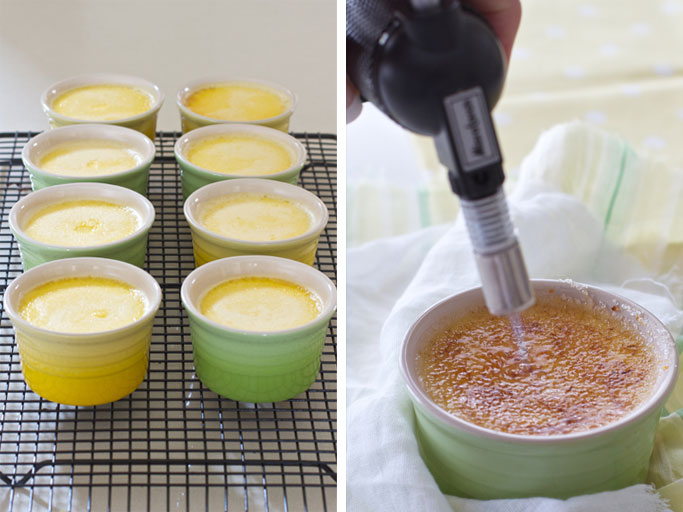
My favourite tool in the kitchen is my small hand held blowtorch which caramelizes sugar so beautifully. Here is a great step by step on How to Torch a Crème Brûlée with short videos.
Interesting Facts : Crème Brûlée is also known as burnt cream, crema catalana, or Trinity cream)
The earliest known reference to crème brûlée as it is known today appears in François Massialot‘s 1691 cookbook “Nouveau cuisinier royal et bourgeois”. The book was translated into English as “The Court and Country Cook” and was published in 1702. There were many editions since then and it was used by professional chefs until mid-eighteenth centry.
In Britain, a version of Crème Brûlée (known locally as “Trinity Cream” or “Cambridge burnt cream”) was introduced at Trinity College, Cambridge in 1879 with the college arms “impressed on top of the cream with a branding iron, though crème brûlée itself was not invented at Cambridge
The Spanish claim that their version of crema catalana is the true predecessor of Crème Brûlée and that they invented it in the 18th century (a full 100 years after England’s claim to custard supremacy).
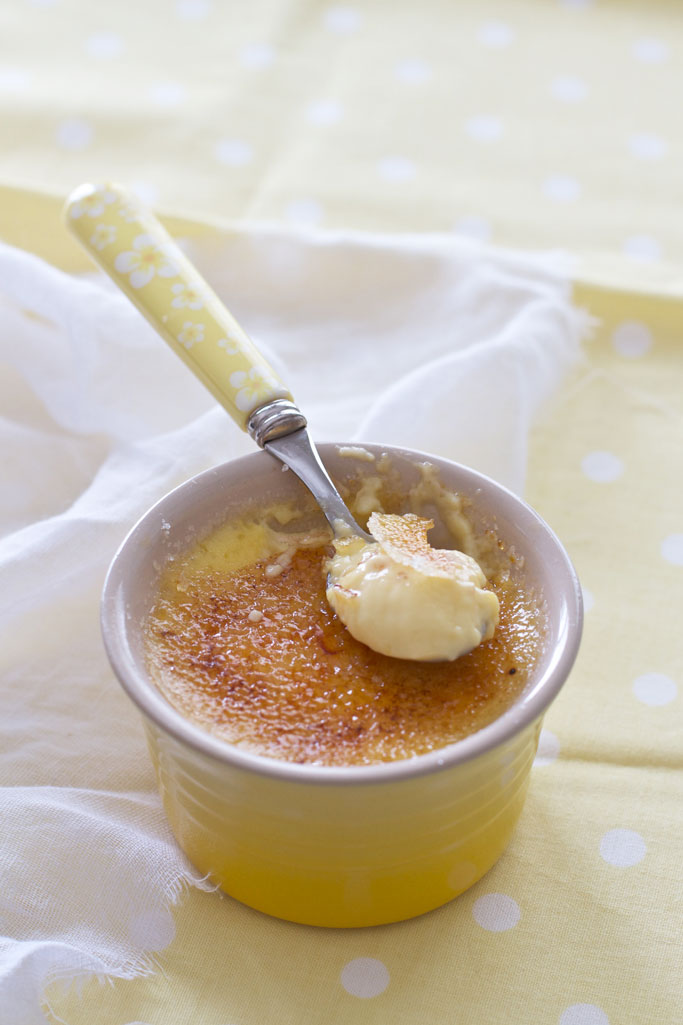
I like to make mine with a very thin layer of sugar on top so that it is easy to crack with a spoon, and is not too sweet. I find if you use a lot of sugar the caramel overpowers the delicate taste of custard. But that is a personal preference, so if you like lots of sweetness, then make a thick disk of caramel on top.

- 500 ml cream 2 cups
- ⅓ cup sugar
- 1 tsp vanilla essence or 1/2 vanilla bean - seeds scraped out
- 6 large egg yolks
- pinch of salt
- Sugar for caramel crust topping
-
Preheat your oven to 150ºC/300ºF .
-
Combine 1 cup cream, sugar, salt and vanilla essence in saucepan and bring mixture to boil over medium heat until sugar dissolves. (I like to use a double boiler pan so that the milk doesnt burn) .
-
Stir in remaining 1 cup cream .
-
Whisk yolks in large bowl until combined.
-
Whisk half the cream mixture into the yolks and then add remaining cream and whisk until evenly coloured and thoroughly combined.
-
Place a kitchen towel in the bottom of large baking dish or roasting pan and arrange six ramekins on towel.
-
Boil the kettle so that you have sufficient boiling water to pour into roasting pan.
-
Pour the egg mixture into the ramekins dividing evenly.
-
Carefully place the baking tray in the oven and pour in the hot water, making sure that the water reaches up 2/3 of the height of the ramekins.
-
Bake until the centre of the custards are just lightly set 30-35mins. They should be wobbly and not solid.
-
Transfer ramekins to wire rack; cool to room temperature, about 2 hours.
-
Cover tightly with plastic wrap, and refrigerate until cold, at least 4 hours or up to 4 days.
-
Uncover ramekins and if condensation has collected on custards, using a paper towel soak up the moisture.
-
Sprinkle each with sugar to cover the surface, and caramelise with a kitchen blow torch or place until a hot grill If you are using the grill method, make sure you are constantly watching them as you don't want them to burn or for the custard to melt.
-
Strain through fine-mesh strainer into 2-quart measuring cup or pitcher (or clean medium bowl); discard solids in strainer. Pour or ladle mixture into ramekins, dividing it evenly among them.
-
Carefully place baking dish with ramekins on oven rack; pour boiling water into dish, taking care not to splash water into ramekins, until water reaches two-thirds height of ramekins. Bake until centers of custards are just barely set, 30 to 35 minutes.
-
Transfer ramekins to wire rack; cool to room temperature, about 2 hours. Set ramekins on rimmed baking sheet, cover tightly with plastic wrap, and refrigerate until cold, at least 4 hours or up to 4 days.
-
Uncover ramekins; if condensation has collected on custards, place paper towel on surface to soak up moisture. Sprinkle each with about 1 teaspoon sugar; tilt and tap ramekin for even coverage. Ignite torch and caramelize sugar.
6 Comments
DELICIOUS!!!!!!!!!!!!
I tried this recipe yesterday and it was actually very easy. I didn’t have a torch so just did it under the grilled and it worked out so well. Great recipe if anyone wants to try it
Yum this looks so creamy
Fantastic recipe – it was easy to make and tasted fabulous
Is it okay to post some of this on my page if I post a reference to this page?
Hi, Could you tell me what your website is first.